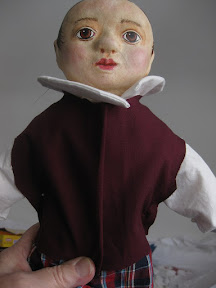
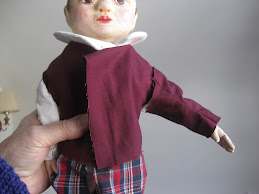
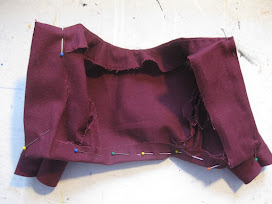
My last post talked about the first step in designing clothing for a doll, that is, creating the under layers first and then draping a pattern over top. This post will show pictures I took while making the dress for my Izannah Walker John Thayer doll challenge. This challenge ends Feb.1 in the MAIDA dollmaking group. I have made a tutorial of the process that explains more and I will send it to anyone who is interested in having a copy. I have noticed that my instructions tend to assume some knowledge of sewing clothing, but I hope the photos make things clearer. Just contact me by clicking on the three parallel lines in the top left corner of this blog.
I begin by using a shop towel to drape the shape of the bodice fronts and tracing around on the shoulder, side and mid-bodice on seamlines.
Do the same for the back.
Darken the outlines and cut out the shapes, leaving a rather generous seam allowance. It is easier to trim away excess than to add extra, although sticky tape is your friend in that case.
Use sticky tape to fit the cut pieces together on the shoulder seams. Anchor the pieces to the doll body with pins to aid fitting. Trim neckline and armscyes carefully if they seem too tight. Adjust the fit around waistline and across back with pins. Tape together side seams.

Fit the fronts together.
Now it is time to drape the sleeve. Many Victorian sleeve patterns hark back to the traditional approach, seamed in front and back, rather than under the armpit.
Cut out the sleeve and tape together to adjust fit on arm and into the armscye.
Once the fitting is satisfactory, take your chalk pencil and clearly mark the shoulder seam, underarm seam, front centres and the waistline that you want for your dress. This waist can be right at natural level, but could also be somewhat below. Cut along the seamlines of bodice and the sleeve and spread out flat. These pieces will be your templates.
Bodice pieces are cut on the straight grain. Sleeves are slightly angled on the grain.
Pin the templates to your fashion fabric and cut out, leaving a 1/4"/.5cm seam allowance. Leave more at the waistline, as it will be turned up when skirt is attached.
Baste together back and the fronts at the shoulder seams. Finger press seams open and lay flat. Make a neck facing by following the outline of the neck, or use bias tape. Sew on facing and turn in. Press. Understitch seam to prevent rolling.
Making sure you have a right sleeve and a left, sew together back seam of each, RST, and finger press flat. Turn up the cuff with whatever method you prefer. I used bias tape as a facing to reduce bulk.
Sew front seams. Turn right side out. Sew side seams of bodice. Right sides together, hand stitch sleeves into armscyes.
Before moving on to fitting the bodice and skirt together, make the pantaloons in fashion fabric using your favourite pattern. I like mine to be split drawers.
Dress doll with pantaloons and proceed to fitting the bodice.
Put bodice onto doll and turn up fabric at desired waistline. Baste in place. Turn in front edges to desired fit. There should be enough fabric to make a button band, or facing to support hooks and eyes. This bodice closes with hooks and eyes. Baste fronts in place.
To make the skirt you will need a strip of the fashion fabric about 23 inches wide and 9-10 inches deep,(58cmx23-25cm). I use a design approach taken from the 18th century. I turn down the top edge about 1/2 inch, (1cm) and turn up and sew the hemline to my desired length, then turn in the short edges about 1/4"/,5cm.
Right sides together, I pin the ends of the strip to the edge of the bodice fronts. I prefer box pleats, so I divide the fabric into half, pin, then quarters and pin, then eighths and pin.
Using the loose fabric segments, I form it into box pleats, pin, then baste the top onto the bodice edge to secure the pleats in place. This method is very inexact, but you can rearrange the pleats until you get the size and placement you like. Knife pleats can be made with this method too.
Whipstitch skirt to bodice edge to edge.
To aid in forming the pleats and pressing them, baste into place. Stitch fronts in place. Press.
With right sides together, whipstitch the front edges of the skirt together from hemline to whatever front opening size works for your doll.
On the bodice fronts, sew hook and eye closures, or buttons and buttonholes.
Embellish with ribbon or braid. Make a belt from fabric or leather. Done!


.jpg)


.jpg)


Comments
Post a Comment